Mantel construction underway and an inlay experiment.

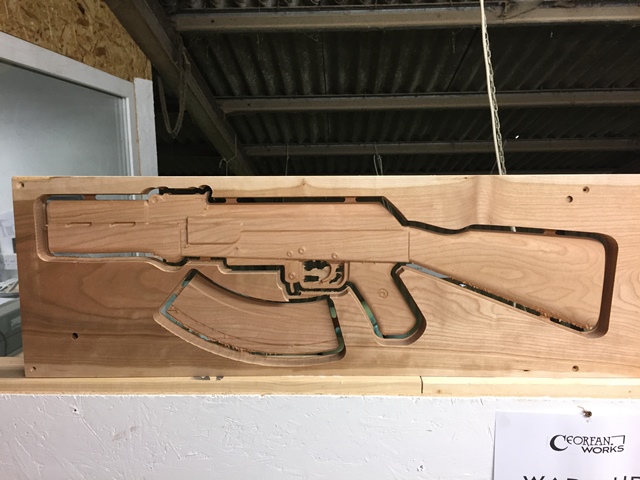
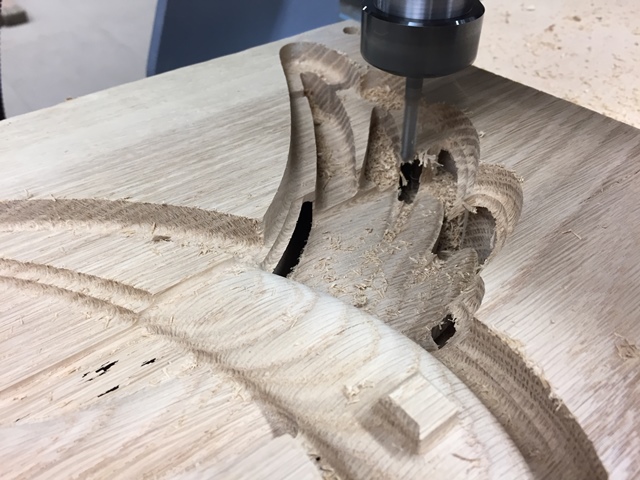
I only managed a few days in the workshop this week so not too much to report. There are a couple of ongoing projects on the bench which are gifts - so I can't post photos of those yet. They are both in the finishing stage where I am still trying to figure out my preferred method for applying paint to text. I made a few tests this week and each method has pro's and con's so no definitive progress - although I should probably stop using oak as a material for projects with text as the grain is a pain to work with. 

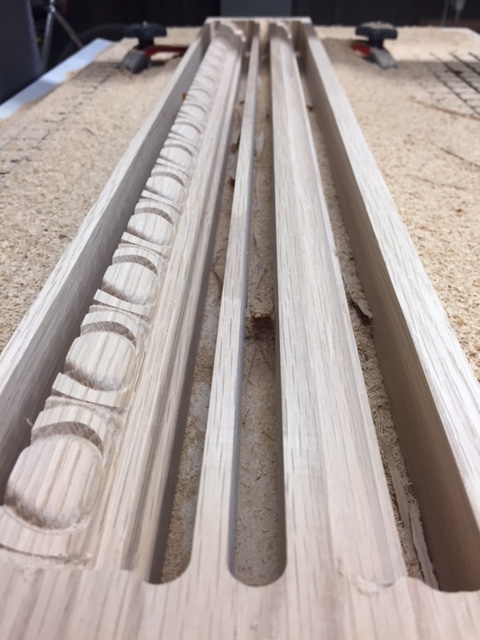
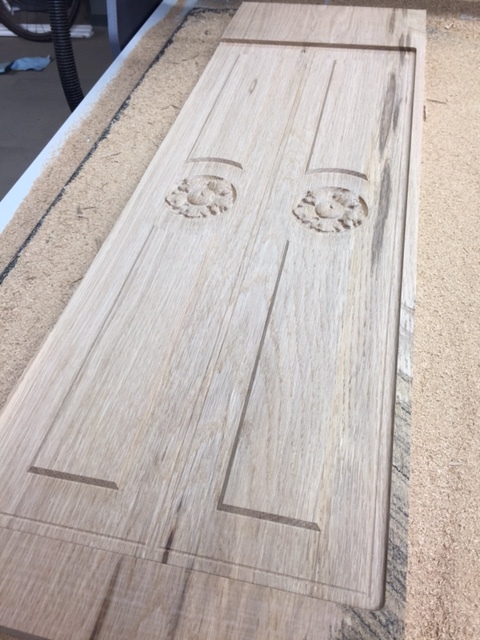
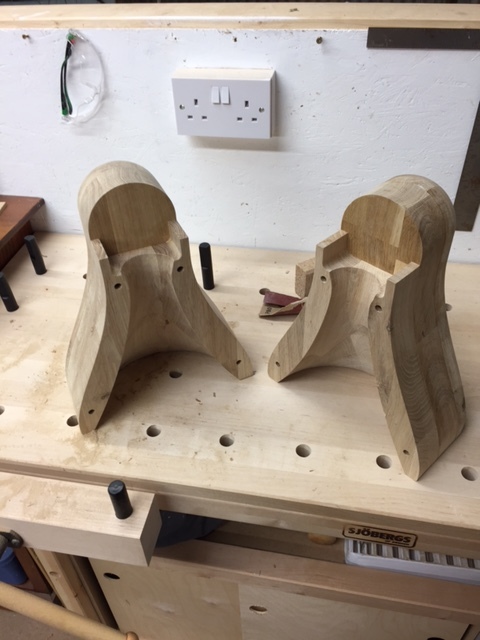
On Thursday we tentatively started the assembly process for the ornate mantel. This mainly involved cutting the carved components out of the stock material and thinking about how exactly it will all go together. You can see a shot below of nearly all the pieces that will go into the final mantel laid out on the bench before we started. A few of the detail carvings still needed cleaning up to remove some "fuzzies" and add a bit of definition in tight areas so I spent a couple of hours doing that. I also needed to cut some angular wedges to glue into the centre of the corbels which you can see below too. Now we've got our heads around the full extent of what needs doing we should make real progress next week in putting together the side columns and hopefully get to the large horizontal part. 

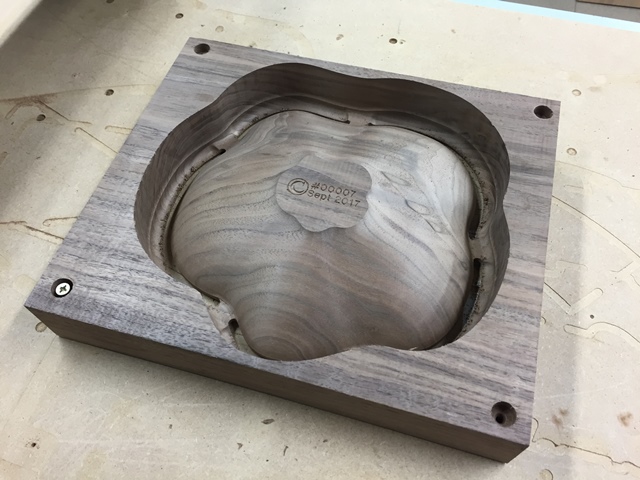
To finish the week I spent a bit of time tinkering with an idea for inlaying different woods into a decorative bowl. This was really an experiment as I was not exactly sure how it would go together or if it would work at all. In this case I created a simple bowl with a rounded octagonal outline. The main bowl to be cut in walnut with maple inlays echoing the bowls top profile. The inlay was pre-machined and glued in before the bowl was cut from the wood. I surfaced this so it was level again then I used my normal 2-sided technique to cut top and bottom. It was intriguing watching the inlays emerge out of the wood and the combination of light and dark chips being created was also an unusual site while it carved.  

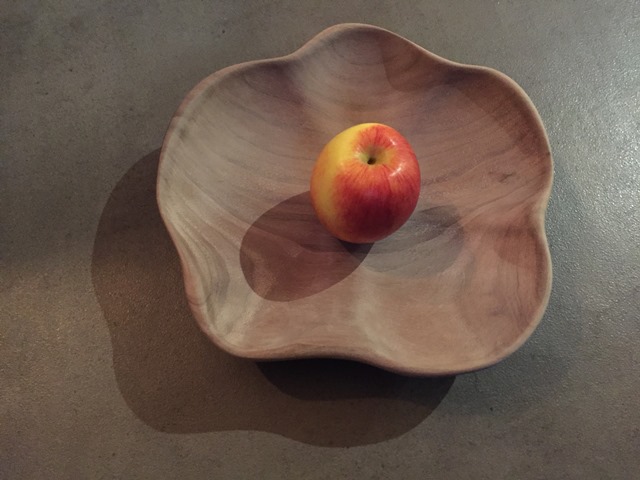
The final result was mixed. As a proof of concept it worked well and from a design point of view the inlay looks very elegant and I like the way the octagon interacts with the sphere of the bowl. The biggest failure was the way the maple and walnut tore when the tool cut across the grain at the 12 O'clock and 6 O'clock sides. There are several reasons why I think this happened - such as not a tight enough fit for the inlay so a bad glue contact, cutting too fast, cutting across the grain, the shape of the bowl creating a point etc. As is always the case though I believe there are ways to combat all these so when time allows I'll cut another test when and look to account for the issues. Regardless I like how it looks so that is a plus and for every test you progress your knowledge...

A new flock of CeorfanBirds, a giant ruler and the Vectric User Group

I revisited my CeorfanBirds project this week and cut a small flock in Walnut wood -  which is what I'd always intended to make them from. This was a test to see how long it would take to machine and finish a reasonable number. I was able to fit 10 birds into the piece of material and was pleased with how they carved.  I've sanded most of them which is really nice as they are very tactile and next week they'll get some oil to really accentuate the grain. At some point in the future these will become an item for sale in a limited edition run. 

A completely different project is the giant ruler I cut this week which will be a high-end children's measuring chart.  As it's around 1800 mm (approx. 6 ft.) then I needed to do multiple setups on the machine to cut it but my trusty jig worked perfectly again to do this. The chamfered edges were not cut on the CNC but done on a spindle moulder by the guys in the workshop. Next week I'll be doing some tests to work out the best way to finish the letters to ensure nice neat edges and no bleed. 

Otherwise this week I did quite a bit of modeling and prep work on some future projects and made a couple of simple hook brackets for the AK-147 to mount in on the office wall. I am pretty sure now that the AK will remain just a prototype and talking point for now...

On Thursday I attended the Vectric UK User Group meeting. It was novel to be sat on the other side of the desk but I enjoyed the meeting, got a lot from seeing the new features of Aspire V9 demonstrated and as normal enjoyed chatting with other Vectric users and the guys who work there. The only downside of the day was I drank too much coffee and had too many ideas swimming round in my brain so slept terribly that night.

Diary: Final Mantel piece, AK-147 and an Amorphous Bowl

Another useful week in the workshop. All the components for the mantel project are now carved. Hopefully this week we'll start the construction process if its fits the schedule. If not it'll certainly be the week following. More on that as it develops. 

One of my own projects that I managed to progress this week was the "AK-147". This is an absurd idea that came about as a pun my nephew made when we were discussing whether the AK-47 can be considered a design classic (obviously ignoring the fact its intended use is to kill people), we were also watching snooker on the TV at the time. He managed to somehow connect the two as 147 is the highest score that a snooker player can score in a single frame. Not much of an origin story but it did get me thinking whether you could combine an AK-47 with a snooker cue to make a semi-functional and quite stupid hybrid of the two, hence the AK-147 started to germinate in my brain. I modelled the components for the weapon a few weeks ago but had not had chance to cut it - I finally managed to machine both sides this week in some cherry boards - as you can see below. These enclose the lower half of a two piece snooker cue, which has another end that screws onto it. I am not sure where this prototype will lead but if I do decide to progress this I would approach it in a different way. For now though I believe this is a completely unique item (perhaps for good reason). 

A more aesthetically pleasing design (I guess depending on the eye of the beholder) that I cut this week is the first in a serious of amorphous bowls. This was carved in walnut and is intended to have a very natural shape which complements the non-linear nature of the wood grain. Its a really pleasing object both for its form, tactility and the fact it is a functional bowl as well. Below its unfinished but once some oil is applied that will further enhance its look.  I'll be continuing to explore incoherent shape and other modifications in future iterations of these bowls. 

The last image for this week shows a couple of the quatrefoil blocks I cut that have been installed in the clients library. They add a really nice but simple piece of detail to the formality of the rest of the library's design. Always nice to see something in place too. 

A long walk home (Not CNC Related)

I'm not sure where the idea to walk from central London to where I live in Bidford-on-Avon (Warwickshire) came from but its been gestating in my brain for a few years now. I figured at a minimum it would provide an interesting perspective on where I live and how it would have been to travel any distance for most people before motorised transport was invented. It also provided a good opportunity to think hard about my year avoiding work and what I'd learned during it.

My start point was the Charles I Statue near Trafalgar Square, this is the point where all distances from London are measured. I had originally planned to follow a path called Shakespeare's Way which goes from the middle of London to Stratford upon Avon although I ended up deviating quite a bit using the always excellent Ordnance Survey maps to help me find my route. I carried all my gear in a rucksack but decided not to camp as the chance of a week of good weather in the UK in September is not good - this was a good choice. 

The walk itself was mostly enjoyable although there were some days I was having to think hard about other things to avoid dwelling on the many small aches, pains and the fact my feet were not holding up well in regard to blisters. After the first 3 days I realised my feet would not manage to maintain nearly 25 miles per day so re-booked the rest of my stops to accommodate something closer to 20 miles per day. Come the final Saturday and one last, long 26 mile day I was very happy to be home.

Other than my feet and in particular my little toes, (still recovering as I write this over a week after finishing) there were lots of positives such as the weather being quite cooperative. While it did rain a few times during the walk most heavy downpours did not occur until the evenings after I'd got to my destination. The real plus to the whole experience was time to think, observe, listen and reflect. Here are some of the observations I noted down during the week, mostly obvious but often forgotten in the mania of day-to-day life:

  • The human body can take a lot of punishment but recovers an amazing amount overnight.
  • The UK is very green.
  • There is lots of joy to find in things we often ignore if you take the time to observe and consider them - walking gives you the time and space to do this. 
  • In Our Time is in my opinion the worlds best podcast and brilliant to walk-to but is hard to concentrate on if your map-reading.
  • The sky is dramatic and beautiful we should look up more often. 
  • Taking many small steps in roughly the same direction will slowly but surely allow you to achieve a much larger goal but sometimes you just have to get your head-down and trust the route you've planned is right without worrying about the end point. 
  • Absence really does make the heart grow fonder. 
  • The George and Dragon in Long Hanborough has amazing pies on a Thursday night. 
  • Its easy to normalise and ignore both good and bad occurrences, either to avoid the bad or because we get used to the good - I should beware of this and aim to acknowledge and appreciate both. 

The last thing to address is would I do this again or recommend others to do similar? The answer is definitely on both counts. Particularly if you would like to find time to reflect on life and the path your taking through it. For me though, next time I'll probably do a bit more prep work to condition my feet better and not just assume because I run a bit that I'll be OK...

Diary: Long Walks, Animals, Mantels, Quatrefoils and Amps

It’s been a while since I’ve updated the website, I don’t think will have inconvenienced anyone with my lack of attention but if you have been waiting then apologies... The summer holidays combined with several weeks occupied with outdoor activities kept me out of the workshop. The last of these diversions and in many ways the finale to my year of avoiding work was taking a week to walk from central London to where I live in Warwickshire (about 150 miles). At some point I'll do a short write up about the walk and my reflections on it. Now I’m home and working full-time on CeorfanWorks updates to this page and the gallery should become weekly, and you’ll see a lot more interesting things being made and documented here.  

In between some of these activities I was able to get into the workshop to cut some animals I’d been asked to create by Tom Philpott who I share the workshop with, These were for a blanket-chest he had been commissioned to make. The customer had selected some images they liked and I’d created the models using Vectric’s Aspire software and added a textured background. These were carved into the oak panels for the top, front and sides of the chest. As you can see in the pictures they came out well and the customer was apparently very happy although I have not seen the finished chest as it was finished and delivered while I was away.

I have been back in the workshop this week and made very good progress with the Mantel project that has been ticking over for the last few months. Next week I only have a few more pieces of the decorative moulding and the top part left to cut. Then hopefully in October we’ll be looking at assembly and installation. This week saw the first set of parts I needed to carve that are longer than the CNC machines 900mm cutting envelope. As such I had to use a feature in the Aspire software to "tile" the toolpaths. This involves modelling and creating the cutting geometry for the full-size part then telling the software that you want to cut part of it first then once that’s complete pull the material through the machine and cut the rest. I was quite nervous about this, as when you’ve already spent half a day carving it would be upsetting (to say the least) to mess up the second part.

I used the CNC to cut an MDF jig that I could clamp down to the table to create an edge to hold the wood against and make sure when I move the material through it remains straight. To index the correct distance after running the cuts for the first part, I carefully measured from the end of the board and made sure to move it through the amount I’d set in the software.

The first piece I cut was a simple moulding shape, you could argue this could be done with regular wood working equipment but part of the challenge for this mantel project I’ve set myself is to cut it all on the CNC, just to prove I can... I chose this part to try first as I knew it would be easy to sand any mis-registration out of it if I messed it up a little. The process worked well but there was a noticeable difference of between 0.25 and 0.5 mm. between each tile. So, before I started the second part which was a more complex Egg and Dart I adjusted my jig a small amount to try an eliminate this issue.

The Egg and Dart came out almost perfectly. There was a very small discrepancy on the straight edges but nothing noticeable on the blend between the 3D shapes. I was impressed with the accuracy of the machine as there were four tool changes for each tile that had to line up. Having built up my confidence in the process, I finally cut the main design for the front on the Mantel. This carving on this is 1295mm (51”) x 153mm (6”) and around 15mm (0.6”) deep. With an estimate of around 10 hours carving and as the centrepiece of the mantel I wanted to make sure this came out right… Thankfully everything worked as well on this as on the previous parts and the alignment and finish were very good. You can see a selection of images of the parts being cut using this process below. 

While these parts were cutting I was able to hand-undercut the acanthus leaves on the corbel. These had such high vertical edges that I felt it was important to do this and they did look much better subsequently. 

Another job I did for Tom in amongst my coming and going from the workshop this month was some small quatrefoils for a library he is building for one of his customers. This was a perfect CNC job and I ended up cutting 96 of them in two setups on the machine. As of today these were being stained and finished for install next week. 

One last thing I’ve been working on was finishing up my CeorfAmp – it’s hard to do it justice in photos but it looks great and sounds good too. It was also a good study in making something impractically heavy to be very portable. Lots of fun though and exactly the kind of not very sensible projects I would like to create more of You can see more pictures on the process to cut and build it on the CeorfAmp page of the website.

Diary: More Mantle, Kids in the workshop, Amp and Award.

This week I was able to make a good start on the final parts for the Mantelpiece reproduction project. I now have most of the pieces for the vertical column carved, although the bits left are the relatively complex capital and corbel at the top. I really beefed up the depth on the models as the sample I cut got a bit lost in the grain of the oak. This seems to have worked well and the decorative carving is better defined on these new parts. The next two weeks are going to be spent mainly on holiday (although you may argue my life is currently one long holiday...) so there won't be too much more activity on this project - although hopefully I may get time to work on the capitals and corbels next week. After that I'll have the challenge of some parts that are too long for my machine that will need to be cut in multiple setups. 

Thursday this week I had the pleasure of a day in the workshop with my kids, Molly in the morning and George in the afternoon. The idea was that they would draw something they wanted to make and I would work with them to show the process of taking it from the drawing to cutting on the CNC and then finishing the parts. We had a lot of fun and there was plenty of stealthy learning opportunities. Molly opted for a 3D relief style model of her drawing with a carved background and frame. George went for a 2D slot-together interpretation of his picture. They were both very happy with the finished pieces (as you can see below) and I it was a good challenging day for me to do the software work and keep them interested while I did it.

Another project I worked on in spare time this week is a horn-shaped guitar amplifier that I've christened the "CeorfAmp". It's still a work-in-progress and the design is evolving as its made. You can see its current incarnation below. The speaker and electronics are from the awesome "The JAM jar amps" website - who make amazing sounding amps in jam jars powered only by a 9v battery. I am pleased to say that I was able to test it last night and it sounds great, nice and loud with the horn amplifying the already surprisingly gritty sound of the JAM jar amp. On top of that it looks really cool and makes me smile every time I see it.  This just needs a back making for the front (figure that out) and then plenty of sanding and it'll be done. I'll put a lot more photos of it in the Gallery when its complete. Its patchwork look is provided by the scrap butcher-block kitchen worktop that its made from. 

To finish I would like to say thanks to Vectric Ltd. (the company where I used to work) who invited me to their celebration for receiving the Queens Award for Enterprise for International Trade 2017. The application for this was something I was involved with just before I left the company so it was particularly nice to see them awarded with this accolade. To commemorate the day I thought it would be fun to make them a plaque,  you can see more images of this project on the Vectric Award Plaque Gallery Page. I decided to go for something quite modern looking and also used the features in the new V9 of their Aspire software to help make the 2-sided 'e' logo. The raised logo looked really effective casting a strong shadow and contrasted nicely with the subtlety of the debossed crown.

Diary: Mantle Plan and Award Plaque

The summer will see me continue to limit time in the workshop in an effort to do some interesting and fun stuff with the kids while they are on school holidays. Last week we went to the National Space Centre in Leicester and also Kew Gardens - these were both excellent and we all enjoyed ourselves. I took lots of photos at Kew of the many interesting leaves and flowers which I am sure will feature in future work. The beauty of these types of places is the potential for inspiration and my stopping to photograph every few paces only causes minor irritation to the family... 

I did manage a bit of time in the workshop and in between cutting memorial plaques for the relatives of a couple of the guys who work downstairs I also started work on an award plaque for Vectric where I used to work. They won the Queens Award for Enterprise 2017 and are having a celebration of this tomorrow. As such I thought I would make them something to commemorate it. Rather than do a conventional plaque I went for a more unusual shape and decided to take the Queens Award logo "E" and cut it as a dynamic 2-sided sculpture. You can see some images of that in progress below. I should be finishing this later today and will post pictures in the gallery of the completed plaque when it's complete (assuming it looks OK).

The other important item completed last week was a final measure of the place where the mantelpiece reproduction is going to be installed. I have created a mock-up of the complete layout and adjusted it to fit the new location. Now I need to split out the individual pieces and create a cutting list so we can order material for it and start carving. Should be lots more pictures of that over the coming weeks. 

Diary: MDF Sign, Birds, Deliver and Plywood

I really like the form or birds as a carved artifact, the Eames House Bird being an iconic example, although as I learned today this was not even designed by the Eames, as discussed here. Regardless I've wanted to create my own stylized ornament in a similar vein but had the intention for it to be carved out of a piece of solid wood and retain the original grain in the finish. It would also be self-standing, show a profile of the wing and not require legs attaching etc. Last week I was able to start playing with prototypes for this as you can see in the pictures below.

I often notice a blackbird in our garden who seems to strut around very much as if he owns the place (which in his world he may well do). Although they are not particularly lauded as a notable bird I always find them elegant and functional, which is generally a good design combination. So I started with various photos of blackbirds, tracing the outlines and then modifying to create a clean profile. I then modeled one side using Vectric's Aspire software, adding a leg shape and spending a bit of time adjusting depths, smoothness etc. with the sculpting tools.

This was setup with 2-sided machining to cut the first two examples in some Iroko wood. These came out well but there was some chipping on the beak and tail. So I setup a second pair, made them slightly larger and also adjusted their position along the grain of the wood to strengthen the areas that chipped off. These came out really well and you can see a photo below of the four next to each other with a couple of them having had finish applied. Overall its a really nice tactile design and I look forward to making some more of these to finalise the design and process. 

I also cut a sign for a local start-up gym (a friend of the people I share the workshop with). This was just cut in some MDF which will be sealed and sprayed. It cut really well using flat-bottom v-carving which clears material with a flat tool then adds the detail with the pointed cutter - this effect can be seen below. 

I was also excited to get a delivery of wood, including some nice pieces of walnut, maple and cherry which I am really looking forward to working with. This week though it looks like I'll be working on starting to carve the actual pieces of the mantel I'm working on for client. 

Lastly I went down to London on Friday to the Victoria and Albert Museum (typically know as the V&A) to see an exhibition on Plywood. I've written a short report with some photos of that here: V&A Plywood Exhibition.